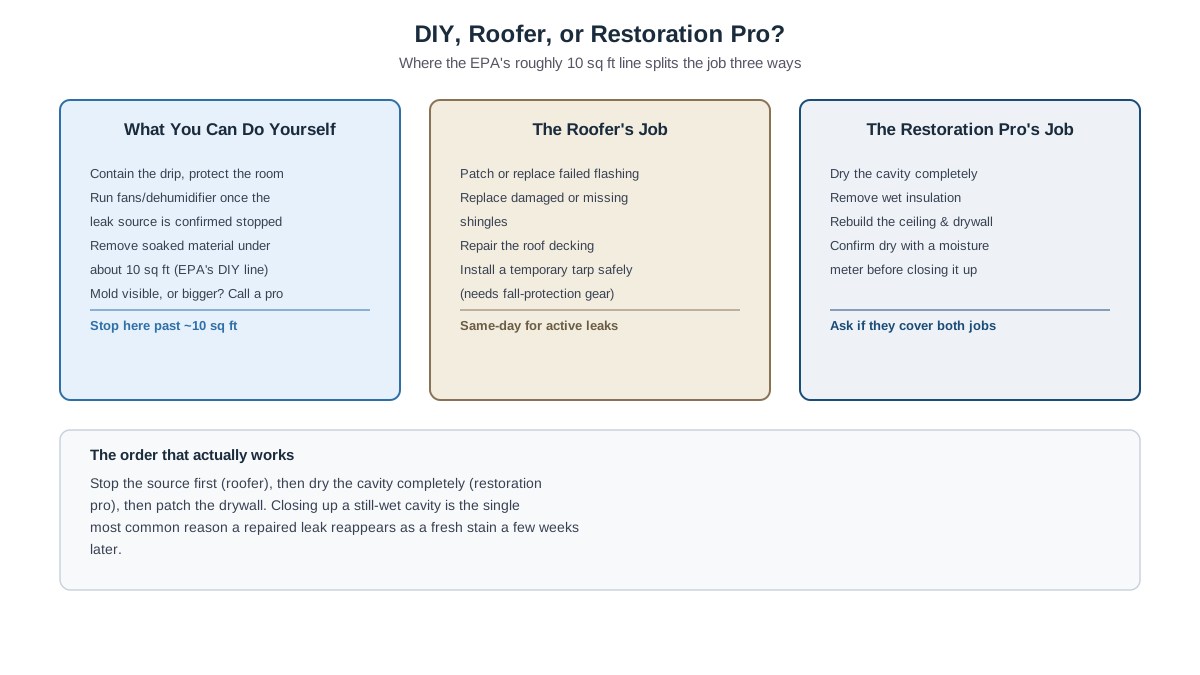
Roof leak water damage starts the moment rain slips past a shingle or flashing failure, then travels along rafters and insulation before it shows as a ceiling stain. Contain the drip, cut power nearby, and get a roofer to close the entry point fast — the EPA's 24-to-48-hour drying window decides whether this stays a simple patch or becomes mold remediation.
You spot a brown ring on the bedroom ceiling two days after a hard rain, or maybe it's already dripping into a bucket you grabbed on instinct. Roof leak water damage rarely looks dramatic at first: a coin-sized stain, a faint musty smell in the closet under the attic. By the time you can see it from inside the house, water has usually been moving through insulation and framing for a while already; that's just how a quiet leak in the roof deck behaves.
This guide walks through where a leak like this usually starts, how to trace it without climbing onto a wet roof, what the interior repair actually costs, what your insurance policy will and won't pay for, and how the picture changes for an ice-dam climate versus a hurricane coast.
The whole outcome comes down to two numbers: how many hours pass before someone patches the roof, and how many hours pass before the wet insulation and drywall behind it are fully dry. Everything below is organized around getting both numbers as low as possible.
What a Roof Leak Actually Does Once It's Inside
A leak doesn't start at your ceiling. It starts wherever the roof's surface has a gap — a cracked vent boot, a lifted shingle, a seam in old flashing — and from there, gravity does the rest. Water follows the roof deck downhill, soaks into the insulation packed between the rafters or trusses, and keeps moving until it hits a low point, a seam in the drywall, or a light fixture box. Water usually travels along rafters before it drips, so the ceiling stain rarely sits right below the actual leak.
That's the mechanism behind attic water damage: what begins as a pinhole-sized entry point spreads across a wide patch of insulation and roof decking long before it ever reaches drywall you can see from the room below. Roof leak ceiling damage almost always looks smaller from underneath than the wet area actually hiding above it, which is why a contractor who opens the ceiling frequently recommends cutting out more drywall than the visible stain would suggest.
Restoration crews classify the water itself by how contaminated it is, under the ANSI/IICRC S500 standard. Rainwater coming straight through a roof starts as Category 1, meaning clean. But water that sits in dusty attic insulation, picks up debris from an old air-handler drain pan, or lingers for days before anyone notices can shift toward Category 2, a distinction that matters once you're deciding whether a patch-and-paint job is enough or the insulation needs to come out — extraction alone runs about $3.50 per square foot for Category 1 water versus $5.25 for Category 2, per HomeAdvisor's 2026 cost data.
Where Roof Leaks Actually Start (Most Common to Least)
Before anyone climbs a ladder, it helps to know where leaks actually originate, worst offenders first. Roofers who spend their days chasing these problems will tell you the same handful of spots account for nearly every call — not the open field of shingles in the middle of a roof plane, but the places where the roof surface is interrupted.
Flashing and roof penetrations
Anywhere metal meets shingle is a seam, and seams are where leaks start. Chimney step-flashing that has separated, a rubber pipe-vent boot that's cracked from years of UV exposure, or a skylight curb with failed sealant are the most frequent culprits. These points fail quietly. There's no missing shingle to spot from the ground, which is exactly why they go unnoticed for so long.
Worn, damaged, or missing shingles
Granule loss, curling edges, and shingles that wind has partially lifted or torn off outright let water underneath the roofing layer itself. Exposed nail heads that have backed out over time are a smaller but common version of the same problem — a pinhole around a nail shank is all it takes during a driving rain.
Clogged gutters and ice dams
A gutter packed with leaves forces water to back up under the shingle edge instead of draining away, and in freeze-thaw climates, an ice dam does the same thing with frozen meltwater instead of rain — runoff crossing from a warm roof plane onto the unheated eave refreezes the moment it drops to water's 32°F freezing point. Both push standing water uphill, under material that was only ever designed to shed water moving downhill.
Valleys, skylights, and low-slope sections
Roof valleys concentrate more water than any other single area, so aging valley flashing or a poor valley installation shows problems early. Skylight seals degrade faster than the surrounding shingles, and any low-slope section of an otherwise steep roof is prone to standing water that a steep pitch would have shed instantly — building code sets the minimum slope for standard asphalt shingles at 2 inches of rise for every 12 inches of run (what roofers call 2-in-12), and requires a second layer of underlayment on anything shallower than that because gravity alone can't clear the water fast enough.
Storm and impact damage
Wind-driven rain can push moisture sideways under flashing that handles straight-down rain just fine, and hail impact can crack shingles or dent flashing without an obvious hole appearing until the next storm finds it — the National Weather Service's own severe-thunderstorm criteria set the bar at hail 1 inch in diameter, roughly quarter-sized, so real damage often starts well before a storm gets that official label. A fallen branch that scuffs or punctures a section of roof belongs in this category too.
What you're noticing
Most likely source
How urgent
Stain appears near a chimney, vent pipe, or skylight
Flashing or boot failure at that penetration
Moderate to urgent — fix before the next rain reopens it
Leak only during heavy, wind-driven rain
Wind-driven rain forced under flashing or shingle laps
Watch closely; worsens with storm severity
Leak appears during a winter thaw, not during rain
Ice dam pushing meltwater back under shingles
Urgent in freeze climates — can recur every thaw cycle
Ceiling is soft, sagging, or visibly bulging
Significant water pooled in the cavity above
Urgent — possible structural risk, stay out from underneath
Stain grows slowly with no obvious storm trigger
Failing valley, worn shingle field, or a slow flashing seep
Needs a roof inspection soon, before it accelerates
Ice dams form where attic heat melts snow on the main roof, then the runoff refreezes at the unheated eave and backs up under the shingles — why these leaks show up during a thaw, not during rain.
What to Do in the First Hour (Without Getting on the Roof)
Once you've spotted water coming through, the first job is containment, not diagnosis. Work through this in order:
Move furniture, electronics, and anything valuable out from under the wet spot.
Set a bucket under the active drip — a standard 5-gallon bucket buys more time before it needs emptying than a bowl will — and lay a tarp or plastic sheeting over flooring you can't move.
Cut power at the breaker panel to any light fixture, fan, or outlet in or near the wet ceiling. Water and electrical boxes are a bad combination, and this step doesn't get skipped.
If the ceiling is bulging or heavy with trapped water, don't puncture it without a bucket in place and a plan for a sudden release.
From inside the attic, if you can safely reach the area on foot boards or joists — framing is normally spaced 16 to 24 inches on-center, so keep your weight on the joists themselves, not the insulation between them — laying plastic sheeting under the leak point can slow the spread, but stepping off a joist through drywall is a real risk, so skip this if you're not confident.
Do not walk on a wet or actively leaking roof to inspect or patch it yourself — wet shingles and underlayment are far more slippery than they look, and this is the single fastest way a roof leak turns into a fall injury.
With the water still coming in, a restoration company that serves your area can talk you through containment over the phone — call 888-407-9931 and describe what you're seeing: where the stain is, how fast it's spreading, and whether the ceiling feels soft or bulges when you press it gently.
How to Trace the Leak Before Anyone Calls It Fixed
Chasing the wrong spot wastes a day and sometimes an unnecessary hole in the ceiling. Work through the steps below before anyone climbs onto the roof itself, and keep the clock in mind while you do it. The EPA's 24-to-48-hour drying window is the line between a simple patch and a mold remediation job.
Start in the attic with a flashlight, not on the roof. Look for wet or discolored insulation, staining on the underside of the roof deck, and any daylight showing around vent boots, chimney flashing, or skylight curbs.
Trace the path uphill from the stain, not straight up. Water runs downhill along rafters before it drips, so the wet spot on your ceiling is often several feet from the actual entry point — follow the framing toward the nearest roof penetration or exterior wall.
Check every flashing point in that direction: chimney step flashing, plumbing vent boots, skylight seals, and valley flashing, in that order.
If nothing is obvious and it's not actively raining, a controlled hose test from the ground can help — have one person run water slowly over a suspect area for fifteen to twenty minutes — ordinary hose-bib flow at typical municipal pressure, 40 to 60 psi, is enough, with no need to open the valve all the way — while someone else watches the attic from inside, working from the lowest section of roof upward.
Note whether the drip continues after rain has fully stopped. A leak that keeps dripping for hours afterward usually means water is trapped in saturated insulation rather than actively entering; one that stops the moment rain stops points to a live entry point still open.
In freeze-thaw regions, if the leak shows up during a thaw rather than during rain, treat ice damming as the leading suspect and check gutter and eave conditions specifically.
One caution before anyone starts cutting into the ceiling: in homes built before the early 1980s, older joint compounds and some textured ceiling finishes can contain asbestos. Disturbing and wetting that material is exactly the scenario that releases fibers, so if your home is that age and the ceiling hasn't been tested, have a professional check before scraping or cutting.
Fixing It: DIY, Temporary, and When to Call a Roofer
What a homeowner can reasonably do
Containment, running fans and a dehumidifier once the source is confirmed stopped, and pulling out obviously ruined material like soaked ceiling tiles are within reach for most people. The EPA's guidance on mold and moisture sets the do-it-yourself threshold at about 10 square feet of affected material — roughly a 3-foot by 3-foot patch. Below that, drying and cleaning it yourself is reasonable if you can do it inside the drying window covered later in this guide. Above that, or with any visible mold already growing, professional remediation is the safer call.
What's a roofer's job versus a restoration company's job
Patching flashing, replacing damaged shingles, and repairing roof decking are a roofer's work. Drying the cavity, removing wet insulation, and rebuilding the ceiling are typically a water damage restoration company's work, though some outfits handle both. The sequence that actually holds up: stop the source first, dry the cavity completely, then patch the drywall. Closing up a still-wet cavity is the single most common reason a "fixed" leak reappears as a fresh stain a few weeks later.
The full roof leak repair cost really breaks into two separate line items: what the roofer charges to close the opening, and what the interior water damage repair costs once the cavity is dry. Treating those as one number is how homeowners end up surprised by a second invoice. For the drying and drywall steps specifically, see how to dry out water damage, and for the ceiling-specific version of this same problem, see ceiling leaking water.
Temporary tarps
A temporary roof tarp buys time between the leak and a permanent repair, but installing one on a pitched or wet roof involves fall-protection gear most homeowners don't own. This is one job worth paying a roofer or storm-damage contractor to handle the same day, rather than attempting it yourself from a ladder.
Contain and dry small areas yourself, but hand off anything past the EPA's roughly 10 square foot DIY threshold, the roof repair itself, or any visible mold to the right professional.
What the Repair Actually Costs
These are national ranges pulled from several contractor cost-survey publishers and cross-checked against each other rather than taken from just one: HomeAdvisor puts the full restoration job average at $3,868, HomeGuide's separate survey lands lower at $2,000 to $6,000, and Fixr's national average sits near $3,000. Your actual quote depends on how much insulation and drywall need replacing, local labor rates, and whether mold remediation gets added to the scope. Treat every figure below as a planning range, not a quote — nobody can price this without seeing the attic and ceiling in person, and we don't have national pricing data for the roofing repair side of the job, so get at least two written estimates from local roofers for that portion.
Job
Typical range
What moves the price
Source
Ceiling patch and repaint (drywall repair)
$450 – $1,600
Size of the damaged area, texture matching, number of coats
HomeAdvisor, 2026
Drywall replacement (general)
$300 – $850
Cut-out size, ceiling height and access
HomeAdvisor, 2026
Water extraction & structural drying, per sq ft (clean water)
$3.50 – $4.25
Category of water, square footage, equipment needed
HomeAdvisor / Fixr, 2025–2026
Full water damage restoration job (average)
$1,383 – $6,369 (avg. $3,868)
Class of damage (1–4), how long the water sat
HomeAdvisor, 2026
Attic mold remediation, if drying was delayed
$1,000 – $9,000
Square footage, containment needs, whether HVAC is involved
Bob Vila / Fixr, 2024–2025
Emergency mitigation service, per hour
$120 – $600
After-hours dispatch, equipment brought on the first visit
Today's Homeowner, 2025
General restoration labor, per hour
$70 – $200
Region, crew size, complexity of the drying setup
Bob Vila, 2023
National interior-repair cost ranges by job type, from a drywall patch to full attic mold remediation.
A rough way to read this: a caught-fast, clean-water leak with a small ceiling patch often lands under $1,600 for the interior work alone, on top of whatever the roofer charges to close the entry point. Once mold remediation gets added because the cavity sat wet past the drying window, the interior portion alone tends to climb toward HomeAdvisor's $3,868 national average for a full restoration job, and sometimes past it. That's the real financial argument for calling someone the same day you spot the stain rather than the same week.
Does Insurance Cover Roof Leak Water Damage?
Coverage depends on why the water got in. A standard HO-3 homeowners policy generally pays for water damage that's sudden and accidental — wind that lifts and tears shingles during a storm, followed by rain entering through that fresh opening, is typically a covered sequence of events. Most policies exclude damage tied to a gradual leak from deferred maintenance: a roof that's been quietly failing for a year before anyone noticed the stain is a much harder claim to win, since insurers read that as a maintenance issue rather than a covered loss.
Nationally, water damage and freezing accounted for 27.6% of homeowner insurance claim dollars in 2022, according to Insurance Information Institute data drawn from ISO/Verisk, with an average claim severity of $13,954 and a claim frequency of 1.61 per 100 house-years. Wind and hail were the single largest category that same year at 40.7% of losses — worth noting because a wind- or hail-caused roof leak is often paid out under that peril rather than filed as a separate water-damage claim, which is part of why the two categories overlap in practice.
Filing a roof leak insurance claim starts before the adjuster ever calls: photograph the ceiling stain from below and, if you can safely see it, the entry point in the attic; keep the section of drywall or insulation your contractor removes in case the adjuster wants to inspect it; and save every receipt for emergency mitigation, since most policies expect you to limit further damage and will reimburse that cost separately from the repair itself.
One distinction worth knowing: rainwater coming through your roof is not the same peril as flood, which insurance defines as surface water rising from the ground or a body of water and typically requires a separate NFIP or private flood policy. FEMA notes that just one inch of floodwater can cause roughly $25,000 in damage — a useful reminder of why that separate policy matters, even though it isn't the coverage a roof leak claim runs through. For a full breakdown of what a standard policy does and doesn't pay, see water damage insurance claims.
Choosing a Roofer and Restoration Company (and Spotting Trouble)
Depending on the cause, you may need two contractors instead of one: a roofer for the source, and a restoration company or general contractor for the interior drying and rebuild. Some water damage companies coordinate both trades directly, which is often the fastest path when the ceiling has already sustained real damage — that line is 888-407-9931.
What to check before you hire
Ask for proof of general liability insurance, and for restoration work specifically, whether the crew carries IICRC certification under the ANSI/IICRC S500 standard (Fifth Edition, 2021) and S520 (Fourth Edition, 2024) if mold remediation is part of the job. Roofing contractors are licensed separately in many states — check your state's contractor licensing board before signing anything. A written estimate should break out the roof repair, the drying equipment and days rented, demolition, and rebuild as separate line items, not one lump sum. Ask how they'll confirm the cavity is fully dry before closing it back up; a visual check isn't the same as a moisture-meter reading near baseline, with ambient relative humidity brought back into the EPA's recommended 30-to-50-percent range (60 percent at the outside limit).
Red flags
Be cautious of anyone who wants full payment before work starts, can't produce insurance proof on request, pressures you to sign an insurance-assignment document you haven't read, or shows up unsolicited after a storm quoting a firm price without inspecting the roof first. For a longer list of questions that filter out bad actors fast, see how to choose a water damage company.
Why Roof Leaks Look Different Depending on Where You Live
The same stain means different things depending on where the house sits, and framing your search around your region's actual weather pattern saves a lot of wasted diagnosis time.
Region type
Common trigger
Timing pattern
Extra thing to check
Freeze-thaw / northern climates
Ice dams pushing meltwater under shingles; frost-heaved flashing
Leaks that appear during a thaw after a cold snap, not necessarily during rain
Attic insulation depth and ventilation, which drive ice-dam formation
Hurricane / heavy-rain coastal areas
Wind-driven rain forced sideways under flashing and shingle laps; storm-damaged shingles
Leaks that start or worsen during named storms and heavy squalls
Roof age and recent storm history — repeated small leaks add up fast
Hail-prone plains and Rocky Mountain regions
Impact cracking on shingles and dents in flashing, sometimes without an obvious hole at first
Leaks that show up weeks after a hailstorm, once the damage finally opens up
A roof inspection after any significant hail event, even without a visible leak yet
Hot, humid regions
Attic condensation on ductwork or a poorly ventilated roof deck, which can mimic a leak
Damp spots that appear with no rain at all, often worse in peak summer
Attic ventilation and humidity before assuming the roof itself is at fault
None of this changes the diagnosis order from earlier: check the likely source for your climate first, then let the timing pattern confirm which direction to look.
Keeping the Next Storm From Finding a New Leak
Once the repair is done, a short seasonal routine keeps the next storm from finding a new opening.
Roof and flashing: have flashing around chimneys, vent pipes, and skylights inspected after any major storm, and plan on a full roof inspection every few years even without an obvious problem. Small flashing seams and cracked boots are cheap to reseal before they leak, expensive after.
Gutters: clear gutters at least twice a year so water sheds instead of backing up under the roof edge, and confirm downspouts actually carry water away from the foundation.
Attic and insulation: in freeze-thaw climates, check that attic insulation and ventilation meet current recommendations — the model building code baseline is roughly 1 square foot of net free attic ventilation for every 150 square feet of attic floor (half that, 1-to-300, where the attic has a vapor retarder and balanced soffit-to-ridge venting). Poor attic insulation is a leading contributor to ice-dam formation, since heat escaping into the attic melts snow that then refreezes at the colder eave.
Skylights and penetrations: rubber vent boots and skylight seals degrade faster than the shingles around them, so plan on resealing or replacing them on a shorter cycle than the roof itself. If you've had one roof leak, walk the attic with a flashlight once a year afterward — catching a second small leak before it becomes a stain is far cheaper than the alternative.
Frequently asked questions
Will homeowners insurance cover water damage from a leaky roof?+
Usually, if the cause was sudden and accidental, like wind tearing shingles loose during a storm followed by rain entering the fresh opening. Most standard HO-3 policies exclude damage from a gradual leak tied to deferred maintenance, since insurers treat a slowly failing roof as a maintenance issue rather than a covered loss.
Is a leaking roof an emergency?+
Treat it as one. Even a slow drip is moving through insulation and framing you can't see, and the EPA's 24-to-48-hour drying window is short enough that waiting even a day or two can turn a simple patch into a mold remediation job. Contain the water, cut nearby power, and get a roofer or restoration company involved the same day if you can.
How much does it cost to fix a leak in the roof?+
The interior repair alone typically runs $450 to $1,600 for a ceiling patch and repaint, based on HomeAdvisor's 2026 cost data, and can reach $1,383 to $6,369 for a full restoration job if extraction and drying are needed. The roof repair itself is priced separately by your roofer based on the roofing material and how many penetrations need resealing; get a written local estimate rather than relying on a national number.
Can you fix a roof leak in the rain?+
Not safely on the roof itself — wet shingles and underlayment are dangerously slippery, and most roofing materials won't seal properly while saturated. A temporary interior fix, like containment and a tarp placed by a professional between rain events, is the realistic option until conditions allow a proper repair.
Why does my roof leak in heavy rain but not light rain?+
It usually means the entry point is small enough that only sustained, high-volume water finds it — a hairline flashing seam, a nearly-failed vent boot, or wind-driven rain that only pushes water sideways under shingle laps during a strong storm. Light rain simply doesn't generate enough volume or wind pressure to force water through that same gap.
How do I fix water damage from a roof leak?+
Stop the source first by having a roofer close the entry point, then dry the affected insulation and drywall completely with fans and a dehumidifier before patching anything. Closing up a still-wet cavity is the most common reason a repaired leak reappears as a fresh stain within weeks.
Why is my roof still leaking after repair?+
Either the original entry point wasn't fully sealed, or there's a second, separate leak nearby that got mistaken for the first one during diagnosis. Trapped water in saturated insulation can also keep dripping for a day or two after a proper repair, which sometimes gets misread as a failed fix rather than water finishing its way out.
Does renters insurance cover water damage from a roof leak?+
Renters insurance typically covers your personal belongings damaged by a sudden roof leak, but the building itself, including the roof and ceiling repair, is the landlord's responsibility under their own property insurance. Report the leak to your landlord immediately in writing and document the damage to your own items for your renters claim.
What does a leaking roof look like from inside the house?+
The earliest sign is often a faint yellow or brown ring on the ceiling, sometimes with a soft or slightly bulging texture when you press it gently. A musty smell in an upstairs closet or bedroom, paint that's starting to bubble, or a drip that only appears during or right after rain are all early warnings before a visible stain fully forms.
How do I stop water leakage from the roof right now?+
Contain the drip with a bucket, move valuables out from under it, and cut power at the breaker to any nearby light or outlet. If you can't safely reach or identify the source, call a roofer or restoration company rather than climbing onto a wet roof yourself — a temporary tarp installed with proper fall protection is the safe version of a quick fix.