Water damage restoration is the structured process a licensed crew follows to stop the loss, dry the structure, and rebuild what got ruined: assessment and classification, water extraction, structural drying, cleaning and disinfection, then repairs. A small Category 1 leak can wrap up in a few days; a Category 3 loss with soaked drywall and flooring can run two weeks or more before the last contractor leaves.
A supply line lets go behind the dishwasher at eleven at night, or a hard freeze splits a copper pipe somewhere behind a wall, and by morning you're standing in water wondering what happens now. Whoever you call next will walk you through some version of the same sequence, because the physics of drying out a house doesn't change from one crew to the next, and neither does the order of operations.
This guide lays out the actual water damage restoration process, the same five phases a licensed crew runs on almost every job: assessment and classification, extraction, structural drying, cleaning and disinfection, and repair. You'll see what each step involves, how long it realistically takes, what it tends to cost, where a homeowner can safely step in, and where doing that yourself turns a modest job into a mold problem.
None of the numbers here are guesses. Costs come from national cost-survey publishers, and the drying and mold thresholds come from the U.S. EPA and the IICRC S500 standard the industry uses to classify a loss before anyone touches a fan or a hose.
The Problem Water Damage Restoration Actually Solves
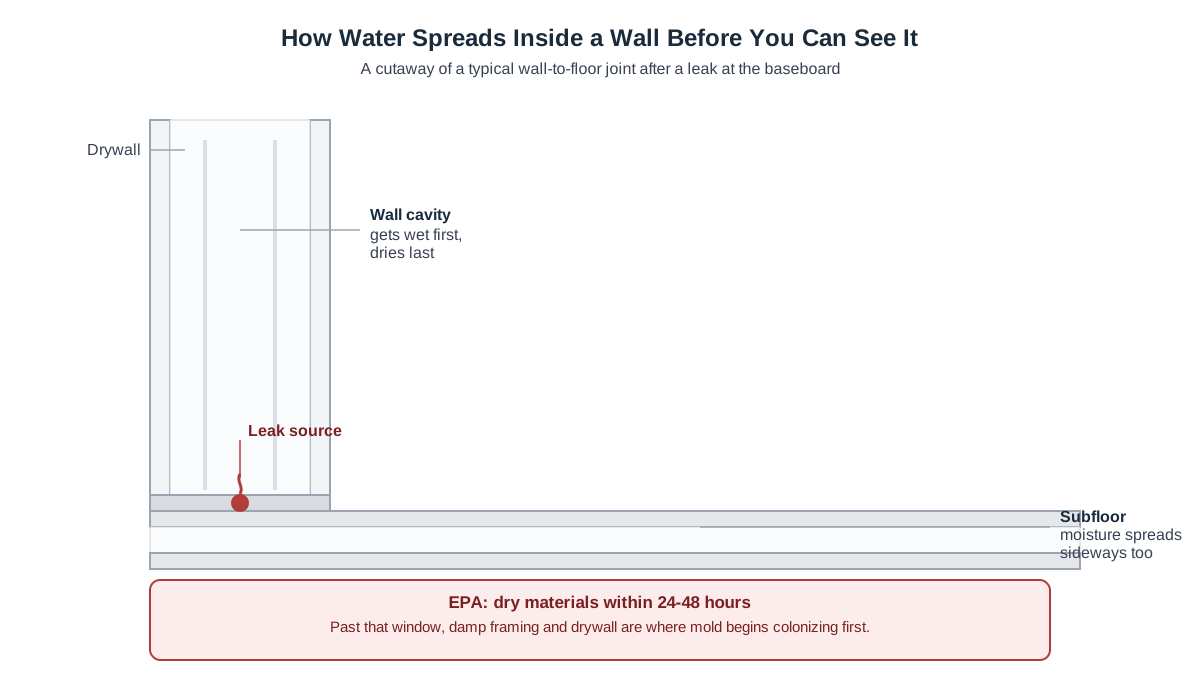
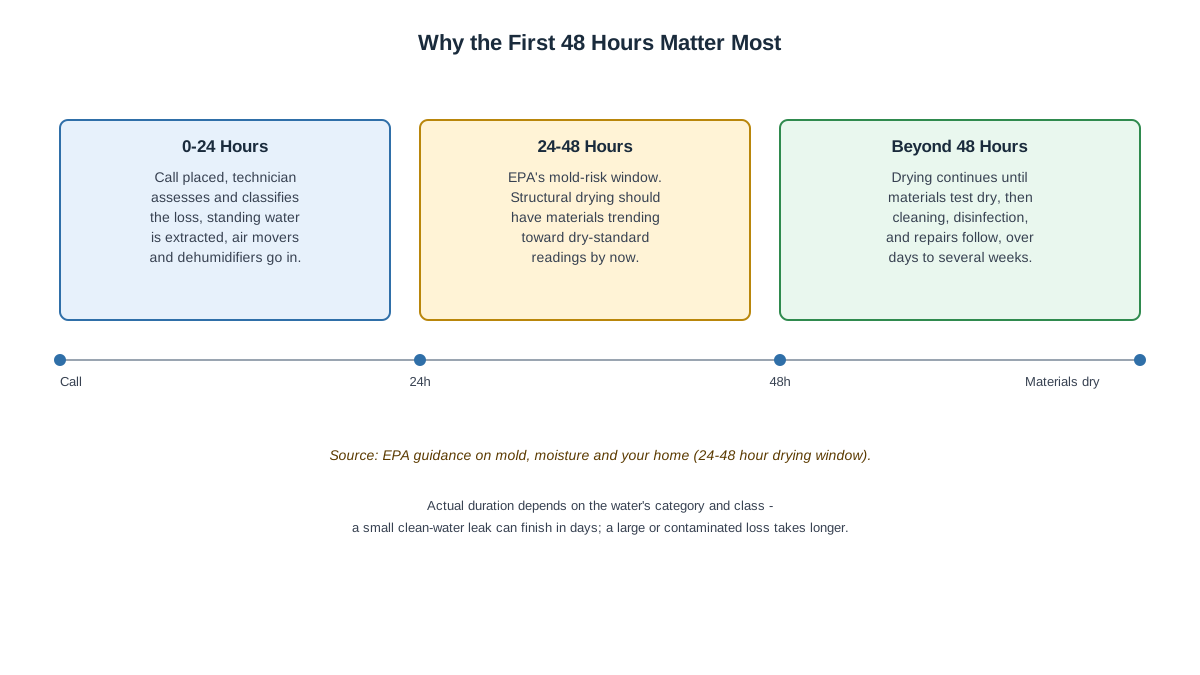
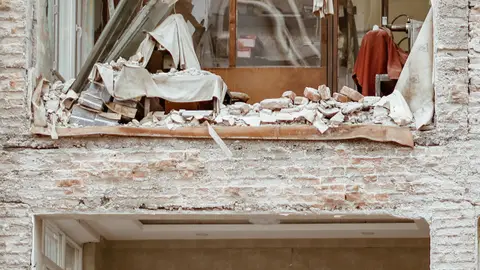
Water doesn't sit still once it's inside a house. It wicks up drywall, soaks into subfloor, and works its way into wall cavities you can't see from the middle of the room. Left alone, a wet building material stays wet for days, and the U.S. Environmental Protection Agency notes that mold can begin colonizing damp material within 24 to 48 hours — which is the whole reason the restoration process runs like a race against a clock instead of a leisurely cleanup.
Water mitigation is the first half of that race: the extraction and drying work that stops the loss from spreading and keeps a $1,500 leak from turning into a mold remediation bill on top of it. Restoration is the full arc — mitigation plus the cleaning, sanitizing, and rebuilding that gets a room back to a livable, pre-loss condition. A company that only extracts water and packs up is doing mitigation, not restoration, and that distinction matters when you're comparing two quotes that look nothing alike.
The goal at every step is the same: remove standing water, pull moisture out of building materials before it becomes a biology problem, and repair only what actually needs replacing. Handled fast, a Category 1 kitchen leak rarely touches the framing. Handled late, that same leak becomes a gutted kitchen.
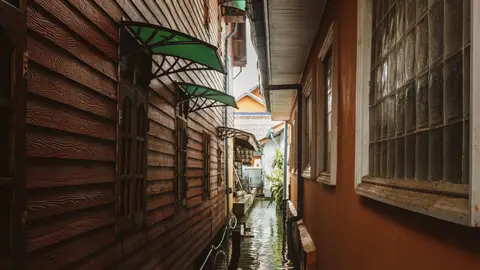
Water doesn't stay where it lands — it wicks upward inside the wall and spreads under the floor, which is why the EPA's 24-48 hour drying window matters so much.
What Usually Causes It, Ranked by How Often It Happens
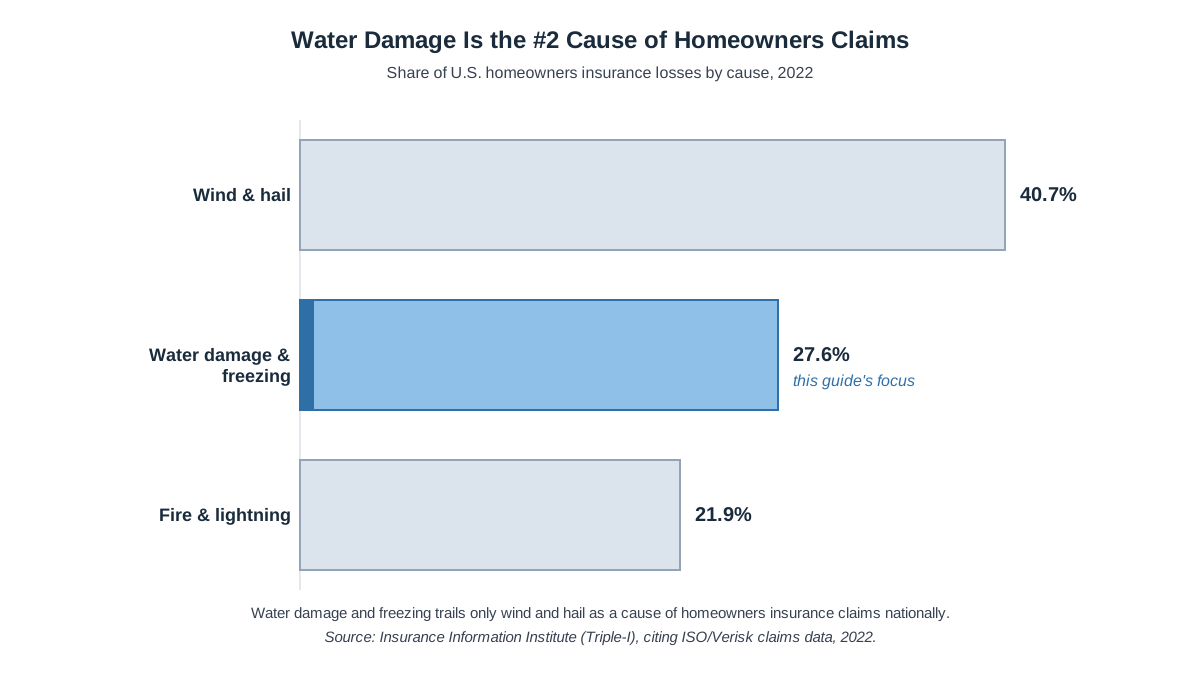
Insurers track this closely, and the pattern holds year after year: water damage and freezing is the single largest cause of homeowners claims after wind and hail, accounting for 27.6% of homeowners insurance losses in 2022, according to the Insurance Information Institute's analysis of ISO claims data. On average that works out to about 1.61 claims per 100 house-years — common enough that most restoration companies treat plumbing failures as their bread-and-butter call, not the exception.
Supply line and pipe failures top the list: a washing machine hose, a dishwasher line, a frozen and burst pipe in an uninsulated crawl space or attic. Appliance failures run a close second — water heaters that rupture at the tank seam, refrigerator ice-maker lines, and dishwasher gaskets that give out quietly over months before anyone notices a swollen cabinet toe-kick. Roof and storm-driven water comes next, more seasonal and more regional, tied to wind-driven rain, hail, and ice dams. Burst pipe cleanup and appliance leaks like a flooded washing machine account for most of the emergency calls a typical crew fields.
Sewage backups and sump pump failures round out the list — less frequent but far more disruptive per incident, since they usually arrive as Category 3 black water rather than a clean supply line break. Slow, hidden leaks (a shower pan, a slab leak, a roof flashing gap) cause the least dramatic damage on day one and the most expensive damage by the time anyone finds the stain, because nobody starts the clock until the leak has already been running for weeks.
Water damage and freezing is the second-largest cause of homeowners insurance claims nationally, per the Insurance Information Institute's 2022 ISO/Verisk data.
Assessment and Extraction: The First Two Steps
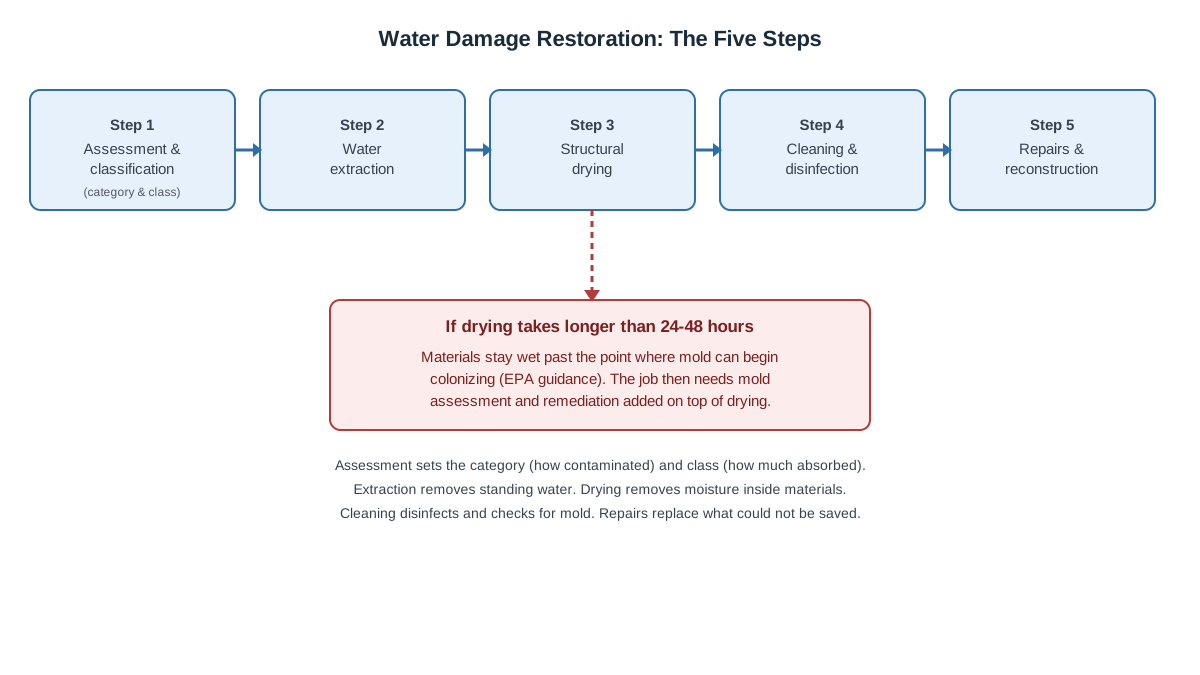
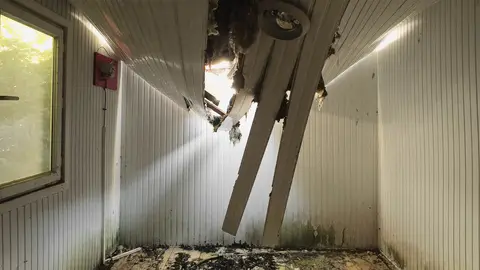
The five steps of the restoration process, and what happens if drying takes too long.
Here's the full water damage restoration process a licensed crew runs, in order:
Assessment and classification — a technician measures moisture, identifies the water's category and class, and maps what needs removing versus drying in place.
Water extraction — pumps and truck-mounted or portable extraction units pull out standing and trapped water.
Structural drying — air movers and dehumidifiers pull the moisture that's left inside the materials themselves.
Cleaning, disinfecting, and mold prevention.
Repairs and reconstruction.
Step 1: Walking the property and classifying the loss
Before anyone plugs in an extractor, a technician walks the space with a moisture meter and, on bigger jobs, a thermal camera, checking baseboards, subfloor, and drywall for moisture that isn't visible yet. This is where the job gets its category (1 through 3, how contaminated the water is) and class (1 through 4, how much material absorbed it and how hard it will be to dry) under the industry's IICRC S500 standard — the ANSI/IICRC S500 Standard for Professional Water Damage Restoration, now in its fifth edition, published in 2021. Get this part wrong and everything downstream is wrong too — a Class 3 loss treated like a Class 1 job will still be damp three weeks later. The full breakdown of what each number means for your safety and your bill lives in our water damage categories and classes guide.
Step 2: Getting the standing water out
This is the water extraction service part of the job, and it's exactly what it sounds like: submersible pumps for anything over about two inches of standing water, then truck-mounted or portable extraction units to pull water out of carpet, pad, and hard flooring. Category 3 water — sewage, floodwater, anything that sat long enough to turn — gets extracted and disposed of separately, and the crew works in protective gear rather than street clothes. If water is still coming into your house when you call, say so right away: call 888-407-9931 and describe what you're seeing — the source, how fast it's rising, whether it looks clean or contaminated — so whoever answers can route the right kind of help. Speed matters more here than anywhere else in the process, since every hour standing water sits is an hour closer to that 24-to-48-hour mold window.
Structural Drying and Cleaning: Steps Three and Four
Step 3: Structural drying and dehumidification
Extraction removes water you can see and reach. Structural drying is the slower, less visible work of pulling residual moisture out of framing, subfloor, and drywall using a combination of air movers, positioned to create airflow across every wet surface, and refrigerant or desiccant dehumidifiers that pull humidity out of the air itself. A technician checks moisture content daily with a meter and tracks it against dry-standard readings, since drywall, framing lumber, and subfloor each have different acceptable moisture ranges. The EPA's guidance is blunt about the target: get relative humidity below 60%, ideally into the 30 to 50% range, and get materials functionally dry within that same 24 to 48 hours mold needs to start colonizing. Depending on the class of loss, this phase alone can run from two days to two weeks, which is why a company pulling its equipment on day two of a Class 3 loss should raise your eyebrows, not your confidence.
Step 4: Cleaning, disinfecting, and stopping mold before it starts
Once materials read dry, the crew cleans and disinfects everything the water touched, with an antimicrobial treatment applied on Category 2 and Category 3 losses in particular. This is also the mold-prevention checkpoint: anything still damp, or missed during drying, is exactly where mold shows up first, often within that same 24-to-48-hour window if nobody caught it. The EPA sets a rough 10-square-foot threshold, about a three-by-three-foot patch, as the upper limit of what a homeowner should attempt to clean and disinfect without professional mold remediation; anything larger, or any mold traced to Category 2 or 3 water, belongs to a professional. Our mold after water damage guide covers what that looks like once the timeline slips.
Repairs: The Fifth Step and the Home Stretch
This is where water damage repair actually happens, even though it's the last of five steps rather than the first, which surprises a lot of homeowners picturing "restoration" as one single visit. Anything that couldn't be salvaged during cleaning gets replaced now: drywall cut back to sound, dry material and re-hung, baseboards and trim, flooring that cupped or delaminated, insulation that got waterlogged and lost its R-value. On a Category 1 or 2 job with a fast response, repairs might be limited to a few feet of drywall and some paint. On a Class 4 loss, this step can mean gutting a room to the studs and rebuilding it from there.
A good crew documents the condition of everything before demolition — photos, moisture readings, a written scope — both for your insurance file and so you know exactly what you're paying to replace versus what got dried and saved. A crew in a hurry skips that step, and skipping it is usually the first sign the rest of the job was rushed too.
How Long Does Water Damage Restoration Take?
Why the first 48 hours after water intrusion matter most.
For a straightforward Category 1 leak caught the same day, extraction typically happens within hours of the call, drying commonly runs several days, and repairs, if any go beyond drywall and paint, add a bit more time on top. A Category 2 or 3 loss, or anything where water sat for more than a day before anyone found it, stretches the drying phase noticeably longer and pushes total project time well past a week once repairs and rebuild are factored in. Class 4 losses involving hardwood, plaster, concrete, or other dense materials that trap moisture sometimes need specialty drying equipment running for a stretch before the drying phase alone is finished.
There's no single honest number here, because a small clean-water leak and a saturated Class 4 basement aren't the same job wearing different clothes. What you can ask for, and should: a written drying plan with target dates, and a re-check of moisture readings before any equipment gets pulled. Our day-by-day restoration timeline guide breaks the schedule down further by category and class.
What Water Damage Restoration Costs
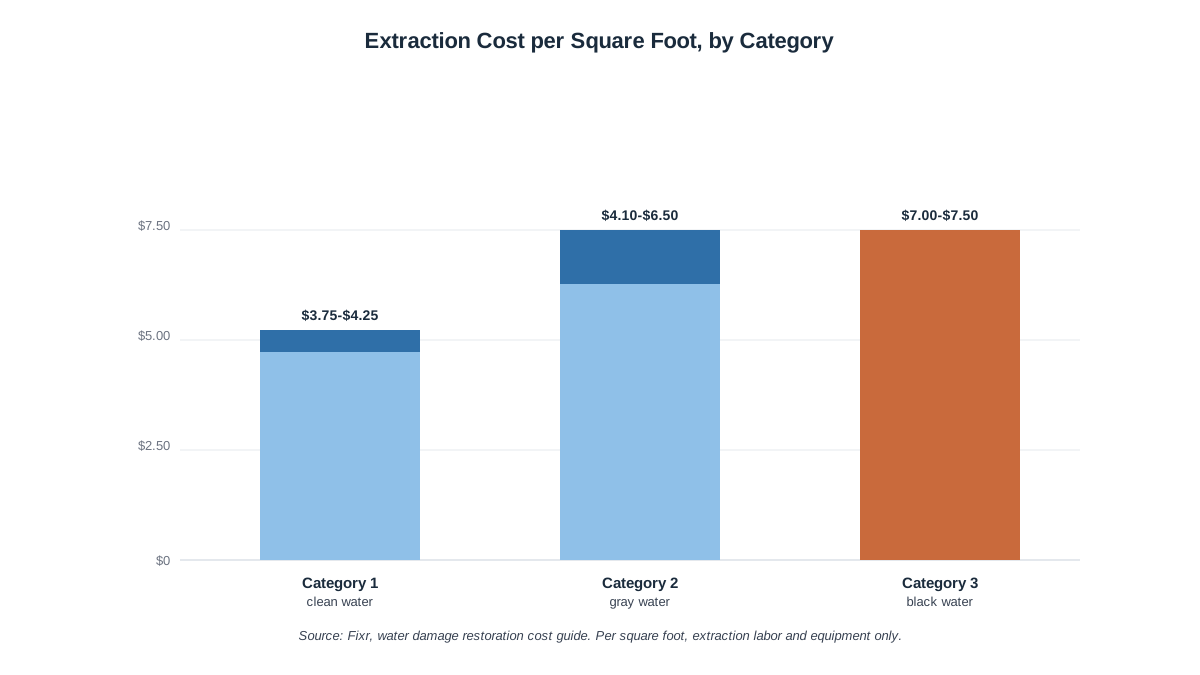
Extraction cost climbs fast as water contamination increases, per Fixr's 2025 cost data.
There's no single number for this, because a $400 job and a $60,000 job can both start with someone typing "water damage restoration" into a search bar. What follows is a researched range pulled from several national cost-survey publishers for 2025 and 2026, not a quote for your job — use it to sanity-check a number a company gives you, not to predict yours to the dollar. Actual cost varies by region, how easily the crew can get to the damage, and how much wet material turns up once work opens walls and pulls flooring: a wall that reads as a Category 1 patch from the doorway can turn into a bigger tear-out once someone pulls the baseboard and finds a soaked stud bay. A written, itemized estimate from a contractor who has actually inspected your property in person is still the only number that applies to your house.
Job or job type
Typical range
What moves the price
Source
Overall restoration job (national average)
$1,383-$6,369 (avg. $3,868)
Category of water, square footage, how long it sat before extraction started
HomeAdvisor
Class 1 - minimal, small area
$150-$500
Fast response, small footprint, easy access
HomeGuide
Class 2 - significant absorption
$1,500-$5,000
Carpet, pad, and lower wall material wicking up moisture
HomeGuide
Class 3 - extensive, overhead source
$5,000-$15,000
Saturated ceilings, walls, and insulation
HomeGuide
Class 4 - specialty drying
$20,000-$100,000
Dense, low-porosity materials (hardwood, plaster, concrete) that trap moisture
HomeAdvisor; Fixr
Extraction, Category 1 (clean) water
$3.75-$4.25 per sq ft
Equipment and labor to pull clean water fast
Fixr
Extraction, Category 3 (black) water
$7-$7.50 per sq ft
Contamination handling, disposal, and PPE
Fixr
Mold remediation, if the drying window is missed
$1,100-$3,400 (avg. $2,225)
Square footage affected, containment needed
HomeAdvisor
Sewage cleanup (Category 3, contaminated source)
$2,000-$15,000+ ($7-$15+ per sq ft)
Volume of sewage, how long it sat, number of rooms
HomeGuide
Insurance often changes what you actually pay out of pocket. A standard HO-3 policy typically covers water damage that's sudden and accidental — a burst pipe, a failed appliance — while excluding gradual leaks and flooding from outside the home, which needs separate flood coverage. FEMA notes that just one inch of floodwater can cause roughly $25,000 in damage, which helps explain why the extraction-cost-per-square-foot numbers above climb so fast once water has been sitting. Nationally, the average water-damage-and-freezing claim runs $13,954, per the Insurance Information Institute's analysis of ISO/Verisk data, which is part of why insurers scrutinize these claims as closely as they do. Read our water damage insurance claims guide before you sign a restoration contract if a claim is involved — the order you document things in affects what gets paid.
What You Can Handle Yourself, and Where That Ends
A small, caught-fast Category 1 leak is genuinely within reach for a lot of homeowners: mop up standing water, run box fans and a rented dehumidifier, pull baseboards to let the wall cavity breathe, and keep at it until an inexpensive moisture meter reads dry. That's real, useful water mitigation work, and it can save the cost of a service call for a job that honestly doesn't need one.
Category
Typical source
Safety gear
Can you handle it yourself?
Category 1 (clean)
Supply line break, appliance overflow, clean-water pipe burst
Gloves optional
Often, if caught within hours and the wet area is small
Category 2 (gray)
Washing machine or dishwasher overflow, aquarium, sump discharge
Gloves and eye protection
Limited to small spills; extraction beyond that is a job for a crew
Category 3 (black)
Sewage backup, flooding from outside, water standing 48+ hours
Full PPE, respirator
No — professional handling and disposal only
If water has been standing for more than 24 to 48 hours, or you can't be certain it's clean, stop doing your own cleanup and call a professional — by the time you can smell mold, it has already had the run of the place. That single rule, drawn from the EPA's own guidance on mold and moisture, is the difference between a modest drying job and a mold remediation bill stacked on top of it.
Beyond that: never step into standing water anywhere near an outlet, panel, or plugged-in appliance, and if the water reached above outlet height, treat the electrical system as compromised until an electrician clears it, not the restoration crew. Sagging ceilings, buckled subfloor, and standing sewage are structural and biological hazards, not weekend projects — that's exactly where a proper water removal service or water cleanup service earns its fee, and where a homeowner with a wet-vac and good intentions can genuinely get hurt. Our how to dry out water damage yourself guide walks through where that line sits, room by room.
Choosing a Water Damage Company
Not every water damage company that shows up in a search result is licensed, insured, or trained to the same standard, and the difference usually doesn't show up until the drying equipment gets pulled too early. Start with certification: look for technicians certified through the IICRC, the body behind the S500 standard referenced throughout this guide, ask to see proof of general liability insurance, and confirm the company carries workers' comp for anyone stepping onto wet, potentially electrically live flooring in your house. Verify both before signing anything rather than taking a sales pitch's word for it: most states run a searchable contractor license lookup through their state licensing board, and a legitimate company will hand over its insurer's name and policy number so you can confirm coverage is active today, not just on file from a past job.
A written estimate before work starts should spell out the category and class of the loss, the equipment being used and for roughly how long, what's being removed versus dried in place, and a plan for re-testing moisture before that equipment comes out. Red flags: a company that wants payment in full before an inspection, one that can't name their IICRC certification when asked, or one that pressures you to sign an insurance assignment-of-benefits form on the spot without reading it. If you need to reach a restoration company that serves your area to start that conversation, 888-407-9931 connects you with one — describe what you're seeing and let them walk you through next steps. Our full guide to vetting a water damage company goes deeper on the questions worth asking before you sign anything.
How to Prevent the Next One
Most of the causes ranked earlier in this guide are preventable, or at least catchable early, with a handful of habits: know where your main water shutoff is, and make sure everyone in the house does too, replace rubber supply lines on washing machines, dishwashers, and ice makers with braided stainless ones every five to ten years rather than waiting for them to fail, and check under sinks and behind appliances a few times a year instead of only after you smell something. A small water leak detector near a water heater or under a washing machine costs less than a service call and can catch a slow leak before it becomes a Class 2 loss.
In colder climates, insulate pipes running through unheated crawl spaces, attics, and exterior walls, and keep enough heat running during a hard freeze to hold interior temperatures well above freezing — a burst pipe from a frozen line is one of the most common and most preventable calls a restoration company gets every winter. A sump pump with a battery backup, commonly $640 to $2,000 installed (avg. around $1,200) according to HomeAdvisor's national data, is worth the cost in any home where the water table or the grading sends water toward the foundation; a pump that fails during the exact storm it was installed for is a common, and avoidable, version of this loss. Our room-by-room prevention checklist covers the rest.
Regional Notes: Freeze Belt vs. Hurricane Coast
Where you live changes which cause on that ranked list is most likely to be yours. In states that see hard freezes, the Midwest, the Northeast, and the Mountain West among them, winter is when restoration companies get busiest, and the cause is almost always the same: an uninsulated or exterior-adjacent pipe that froze, expanded, and split: water expands by roughly 9% in volume as it turns to ice, and once the pipe wall itself sits at 32°F or below for a sustained stretch, that expansion is what splits rigid copper or PEX, often not discovered until it thaws and starts flowing. Insulating pipe runs in crawl spaces, garages, and exterior walls before the first hard freeze of the season prevents more of this single cause than nearly anything else on this list.
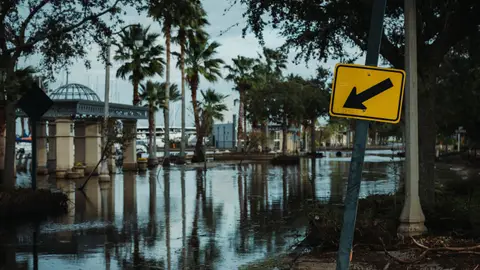
Along the Gulf Coast and the Atlantic seaboard, the seasonal risk shifts toward wind-driven rain, storm surge, and roof damage from tropical systems, which tend to produce more Category 3 losses, since storm and floodwater carries contamination a clean supply-line break never does. FEMA's National Flood Insurance Program paid an average of more than $66,000 per claim between 2016 and 2022, a useful gut-check on why separate flood coverage matters in these regions. NOAA's climate normals data is a reasonable starting point if you want to know which risk profile actually applies to your location before deciding how much to spend on prevention versus response readiness. Either way, the restoration process itself, extraction, drying, cleaning, repair, doesn't change; what changes is how fast you need to move and how contaminated the water is likely to be when it arrives.
Frequently asked questions
What is water damage restoration?+
Water damage restoration is the professional process of stopping water intrusion, removing standing water, drying out the structure, and repairing whatever couldn't be saved. It runs through five phases: assessment and classification, extraction, structural drying, cleaning and disinfection, and repair. The goal is a home back to a safe, dry, pre-loss condition before mold or structural damage sets in.
How long does water damage restoration take?+
It depends mainly on how contaminated the water was and how much material absorbed it. A small, quickly caught Category 1 leak can wrap up extraction and most of the drying in a few days. A larger or more contaminated loss, especially anything involving Category 3 water or dense materials like hardwood and plaster, commonly stretches drying and repairs well past two weeks.
What does a water damage restoration company do?+
A full-service company handles the entire process: it classifies the loss, extracts standing water, sets up drying equipment and monitors moisture until materials test dry, cleans and disinfects everything the water touched, and repairs or rebuilds what got damaged. Some companies only handle extraction and drying and hand repairs to a general contractor, so ask which parts of the job a company actually covers before hiring.
What is a water damage restoration technician?+
A restoration technician is the person trained, and typically IICRC-certified, to inspect, classify, extract, and dry a water-damaged structure using moisture meters, extraction equipment, and industrial air movers and dehumidifiers. Certification usually covers water damage restoration specifically, with additional credentials available for applied structural drying and microbial remediation on more complex or contaminated jobs.
What is water mitigation?+
Water mitigation is the first half of the restoration process: extracting standing water and drying the structure to stop the damage from spreading, before any repairs happen. It's the part of the job that determines whether a leak stays a modest drying project or turns into a mold remediation job stacked on top of everything else.
How long does water mitigation take?+
For a small, clean-water loss, mitigation (extraction plus structural drying) commonly takes a matter of days from the first visit to a dry reading on the moisture meter. Larger or more contaminated losses, or ones involving dense materials that hold moisture, can push mitigation alone past a week before repairs even start.
Why is water mitigation so expensive?+
Most of the cost is equipment time and labor, not materials: air movers and dehumidifiers run continuously for days, a technician returns repeatedly to take moisture readings, and contaminated water requires disposal and protective equipment that clean water doesn't. Extraction alone runs roughly $3.75 to $7.50 per square foot depending on how contaminated the water is, before drying equipment or repairs are even counted.
Does homeowners insurance cover water damage restoration?+
Usually, if the damage was sudden and accidental, like a burst pipe or a failed appliance, a standard HO-3 policy typically covers it. Gradual leaks that built up over time, poor maintenance, and flooding from outside the home are the most common exclusions, and flooding specifically needs separate flood insurance. Water damage and freezing made up 27.6% of homeowners insurance losses in 2022, so insurers scrutinize these claims closely.
How much does water damage restoration cost?+
Nationally, the average job runs around $3,868, with most homeowners spending between $1,383 and $6,369, though small jobs can run a few hundred dollars and severe losses can run into six figures. The real driver is the water's category and class, plus how much square footage and how many materials it reached. A written estimate from a company that's inspected your property is the only number worth planning around.
What causes water damage in homes?+
Most often it's a plumbing failure: a burst supply line, a frozen pipe, or a failed water heater. Appliance failures (washing machines, dishwashers, refrigerator ice makers) and storm-driven roof leaks are close behind, with sewage backups and slow hidden leaks, like a shower pan or a slab leak, rounding out the list. Water and freezing account for a bigger share of homeowners claims than fire, 27.6% versus 21.9% in 2022.
How do I get an estimate for water damage restoration?+
Call a company that serves your area and ask for an in-person inspection before agreeing to anything by phone. A legitimate written estimate should list the water's category and class, the equipment being used, an approximate timeline, and what's being dried in place versus removed and replaced, not just a single lump-sum number.